Showing posts with label Blogger. Show all posts

Why Blogger is better than Wordpress

Sunday, September 25, 2011

Blogger is better than Wordpress!


If you are thinking to start a new blog then choosing a good blogging platform matters a lot. The two most popular ones are Blogger and Wordpress. Today almost all of the blogs chose either Blogger or Wordpress for their website.


Since I have been with blogger since 2007 when I started this blog, I must say that if you are new then Blogger is the one you should go for. Its simple and quite easy to manage. But you must also be thinking to go for Wordpress right? So here’s a quick comparison of why to chose blogger over Wordpress.


Why Blogger is Better?


  • Easy Registration :


You can create a blogger blog for free!


Its really easy to register and start your own blog, you can even create a new blog while reading this post. Just go to blogger.com and register your blogname.blogspot.com with your Google account and you are set to go!.


  • Easy Setup :


Setting up Blogger Blogs is Easy!


Unlike Wordpress you do not have to install or setup anything on your server. Blogger has nothing to setup until you move it to your custom domain.


  • Easy postings :


Rich HTML text editor offers a great way to post.


Start posting by just logging in to the blogger.com and using the inbuilt online post writer which offer rich HTML writing.


  • Easily skin your blog :


Many cool blogger templates for blogger


You can easily put new themes to your blog by just downloading the xml file and then uploading it by logging in to your blogger account and your posts remain intact while you do so. There are so many great themes for blogger blogs over the web. Just Google ‘blogger templates’ and you will see many cool themes for blogger.


  • Manage Widgets :


Thrid Party Widgets are supported in Blogger


You can add widgets in your blog by adding HTML/Javascript codes which is really flexible and easy. So no need to manage plugins like in Wordpress.


  • Easy Photo Uploads :


Get you Picasa Web Albums for photo uploading..


When you get a blogger blog with your google acccount then you also get Picasa where all the photos you upload in your posts are stored. You can easily share the albums on your blog.


  • Easily Earn from Blog :


image

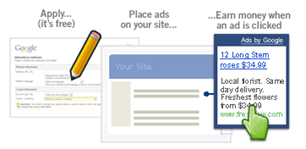
Earn money with Google Adsense !


You can easily earn money from your blogger blog by creating  or integrating it with Google Adsense account. Just place Google ads on your blog and if you get good traffic then you blog can earn you money depending upon the number of clicks and page impressions.


  • It’s Google :

Google is awesome !

It was bought by Google and you can expect a lot amazing apps, widgets and cool plugins for Blogger blogs in future as it’s a part of Google now!.


If you Love Struck loved my post, then feel free to subscribe to my feed Click here!

How to enable Mobile Blogger Templates for Blogger blogs

Thursday, June 16, 2011

Mobile Template version of my blog

Blogger has launched a new feature for blogger blogs with which you can give a different view of your blog to the mobile web users. Now you can enable the mobile template for your blog which shows your blog in a more simple way without any big images, animations and advertisements on mobile devices.


You don’t have to make any changes to your current blogger template, all you need to do is enable the setting on your blogger dashboard.


Here’s How to do it:


  • On Dashboard screen click on Settings


Blogger>Dashboard>Settings


  • Go to Email and Mobile Tab.


Settings>Email & Mobile


  • Under Mobile Template choose Yes and you are set.


Click on Yes and enable Mobile Template


  • You can also preview how your blog looks in the mobile template version by clicking the mobile preview or by scanning the QR code with your mobile camera.


What’s different in Mobile Template


The mobile template for blogs just only shows up the posts and the comments from your blog, so that the blog can be easily viewed in any mobile browsers like Iphone Safari, Android and others.


So whenever someone open your blog from Mobile device, they will see the mobile version not the original version. Remember, No other links, buttons, ads and any other stuff on your blog are shown up in mobile template except those mobile adsense ads which are shown on the top. The full original desktop version can also be viewed by clicking the Web Version link below.


The mobile templates loads up real fast on mobile browsers and it makes the blog to be read easily on small screens of mobile devices.


If you Love Struck loved  my post, then feel free to subscribe to my feed Click here!

How to add Related Posts widget in Blogger blogs

Saturday, January 2, 2010

blogger-logo If you are searching for a blog widget which help you display the related post on your post footer then you are on right place. I have found some real cool widgets for Blogger blogs which can be added to blogger blogs with ease. These widgets are of great use as the reader spends more time reading your blog and you get the maximum benefit. They are the best way to make reader explore your blog in easy way.


Some of the best assorted widgets are below, so check them out :


1. Linkwithin Widget :


linkexaple You can go to Linkwithin.com and get this widget by filling up your Email, Web address , your blogging platform and the number of posts you want to show up. No sign-up is required, just fill up the  details and you will see a new page opened with complete instructions on how to install on your blog.


linkwithin

1.1 In the first step click on install widget.


blogger window

1.2 A blogger window will open then click on add widget.


1.3 That’s it now the widget is added on your blog layout .


layone

1.4 Just move it to the post footer and click on save, now the widget should be visible on your post footer.


2. Blogger Widget :


asdf

This widget is from Bloggerplugins.org, it will also display the post the same way Linkwithin widget did. It’s based on displaying the posts accrording to the blogger labels that is the posts related to the same labels are displayed only. This widget is added by editing the html code of your blog. To start applying it open up Edit Html of your blogger blog by signing in to the blogger. Click on the Expand widgets template to open the complete template. Now you have to search for some code and then copy and paste the widget code into the template. You can follow the post here Bloggerplugins.org . Just like the linkwithin widget you can also set the maximum number of post to be displayed by changing the value in this line of code :


var maxresults=5;


So these were the two widgets with thumbnails, there are also other widgets which display only text links to the related posts but I think they do not have much impact on the reader as the ones with thumbnails is more attractive.


If you Love Struck loved  my post, then feel free to subscribe to my feed Click here!

How to reduce spam in your Blogger blog comments ?

Wednesday, December 30, 2009

spam I really hate those bullshit comments in which the commenter leaves his URL in the end, like “This is really cool site, plz visit my site again , http://djflewjwgjonl3r3.blogspot.com” and other blah! blah! blah! messages. These all are considered SPAM. So how we can reduce this thing in our blog.


If you are using a blogger blog then here is a simple method to reduce SPAM :


1. Click on Settings

1. Just login to your Blogger Account on blogger.com and click on your blogs Settings.


2. Go to Comments


2. Look for Comments Tab under settings page.


3. Choose these options under this section.

3. Under the Who can Comment Section choose Registered Users ( my recommendation ) or Users with Google Account . This will allow only those persons to comment who have accounts on Google, OpenID, Typepad, Wordpress, AIM and Live Journal. Now those Anonymous and unnamed guys to put those crappy comments. Therefore if a person wants to comment he/she should be a registered user of any  of those platforms.


4. You will also find this section and choose as in the image

4. Now head to the comments moderation section and choose Always Ask option. Now whenever someone comments on a post you will be asked if the comment should be published  or rejected. If non-member of your blog leaves a comment then the update will be sent to your email.


 5. Verify Words to prevent bots5. Verify Words to prevent bots

5. Scroll down and you will find Show word verfication for comments and choose yes.When someone comments a Random image with some words will be shown, if they are typed correctly only then the comment will be sent for moderation or posted.


6. Finally you have configured!!

6. Finally click on save settings and you are done.


You may find similar settings in other blogging platforms like Wordpress, Typepad and others.So from now on only publish the comments you feel are safe.


If you Love Struck loved  my post, then feel free to subscribe to my feed Click here!

How to blog with Microsoft Office Word 2007

Wednesday, October 21, 2009

Microsoft Office 2007 has very smart feature with which you can publish your documents as blog posts or just use it like windows live writer. All you need is Microsoft office 2007 installed on your system. So lets get started with Blogging in Microsoft Word 2007.


These steps will help you in setting up your blog for use with Microsoft Word 2007.


Lets go:


  • Open up Microsoft Word 2007 on your PC.

Click to Enlarge!


  • Now click on the left cornered button with office logo then many options will open.


Click to Enlarge!

  • Select Publish and then choose Blog under this option.


  • Now a Register a Blog account window will appear.


Click to Enlarge!

  • Click on Register now to set up your blog.


  • Select your Blogging platform like Blogger, Wordpress, etc.


Click to Enlarge!

  • For example I am using Blogger as blogging platform and then click on Next.


  • Enter your Username and Password .


Click to Enlarge!

  • Choose a Server for storing your images. If you have a server then enter the upload URL and  source URL otherwise you will have to choose None-Don’t upload pictures. Sometimes blog service providers automatically host images you upload in the post, so contact your Blog service provider for more information.

Click to Enlarge!


  • Click on OK then Word will ask for your confirmation on sending information.


Click to Enlarge!


  • Now choose your blog and you are ready to blog.


If you Love Struck loved  my post, then feel free to subscribe to my post &

get them sent into your Inbox Click here!

Recent Comments Widget for Blogger !!

Tuesday, July 22, 2008

recent-comments

Just like the WordPress blogs where plugin of Recent Comments on Blog shows off the latest comments on any of your Blog posts, now Blogger also has the same thing which is quite easy to embed.


All you have to do is fill the form at Blogger Buster :


  • Widget title : which should be Recent Comments
  • Blog address
  • No. of Comments to display : put the number of comments to be displayed on the widget.
  • Show comment date : Tick to show or Cross if you don't want to display the date of comment.
  • Show post title : Tick to show or cross if you dont want to show the post title. ( My recommendation : Cross it )
  • Set the summary size  of the comment to be displayed on the widget.


After this you can click on Apply & then your widget will be ready with settings defined by you. 


Thanks! to Blogger Buster for this awesome widget..

Tracking & Moderating Comments in Blogger blogs

Friday, June 20, 2008

jpeg-dreadbob


Tracking Comments


If you are new to Blogging then you must be keen to see some comments on your Blog. The comments on main Page can traced easily & but If you are concerned about the comments on older posts which are no longer being shown on main page of your Blog. Here's how you can trace the comments on Blogger Blog : -


  • Login to your Blogger Account.
  • On Dashboard screen, Click on Settings link of your Blog.
  • Now click on Comments Tab.

comment-dreadbob-blogspot

  • Scroll Down to Comment Notification Email setting & add your Email address.

notfication-dreadbob

  • Save Settings.


Now you will be notified via Mail whenever someone leaves a comment on your Blog. You can also add up to 10 Email addresses where notifications can be sent.


Comment Moderation


It means editing the comments left by people on your Blog before showing them on the site. This helps reduce Spam & abusive comments easily. You can set on the Comment Moderation setting by following these steps :


  • Under the Same Comments Tab as above.

comment-dreadbob-blogspot

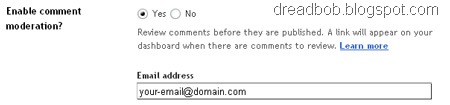
  • Scroll down to ' Enable comment moderation? ' setting.
  • Choose ' Yes'.

moderation-dreadbob

  • You can also add up your E-mail Id to get notifications when Anonymous Users leave comments.


After you choose Yes, a link will appear on your dashboard whenever there are comments to review.


If you loved Love Struck my post, then feel free to subscribe to my post &

get them sent into your Inbox Click here!

Add an image to your blogger header

Thursday, May 24, 2007

Backstage

Saturday, March 31, 2007


» View HTML «
Thanks to Webtalks

How to install a Blogger XML template

Thursday, April 13, 2006

Make sure you have backed up your template before installing a new one.

(You can also install a HTML template).

1.


You have to choose a XML Template


2.


Save the XML file on your hard disk.


3.


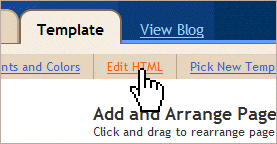
Go to your Blogger Control Panel - Edit HTML


4.


Browse the XML file you have saved and upload it.


5.
Finished!

Related Posts with Thumbnails


Copyright © Blog Rescue