Showing posts with label blogging. Show all posts

Why Blogger is better than Wordpress

Sunday, September 25, 2011

Blogger is better than Wordpress!


If you are thinking to start a new blog then choosing a good blogging platform matters a lot. The two most popular ones are Blogger and Wordpress. Today almost all of the blogs chose either Blogger or Wordpress for their website.


Since I have been with blogger since 2007 when I started this blog, I must say that if you are new then Blogger is the one you should go for. Its simple and quite easy to manage. But you must also be thinking to go for Wordpress right? So here’s a quick comparison of why to chose blogger over Wordpress.


Why Blogger is Better?


  • Easy Registration :


You can create a blogger blog for free!


Its really easy to register and start your own blog, you can even create a new blog while reading this post. Just go to blogger.com and register your blogname.blogspot.com with your Google account and you are set to go!.


  • Easy Setup :


Setting up Blogger Blogs is Easy!


Unlike Wordpress you do not have to install or setup anything on your server. Blogger has nothing to setup until you move it to your custom domain.


  • Easy postings :


Rich HTML text editor offers a great way to post.


Start posting by just logging in to the blogger.com and using the inbuilt online post writer which offer rich HTML writing.


  • Easily skin your blog :


Many cool blogger templates for blogger


You can easily put new themes to your blog by just downloading the xml file and then uploading it by logging in to your blogger account and your posts remain intact while you do so. There are so many great themes for blogger blogs over the web. Just Google ‘blogger templates’ and you will see many cool themes for blogger.


  • Manage Widgets :


Thrid Party Widgets are supported in Blogger


You can add widgets in your blog by adding HTML/Javascript codes which is really flexible and easy. So no need to manage plugins like in Wordpress.


  • Easy Photo Uploads :


Get you Picasa Web Albums for photo uploading..


When you get a blogger blog with your google acccount then you also get Picasa where all the photos you upload in your posts are stored. You can easily share the albums on your blog.


  • Easily Earn from Blog :


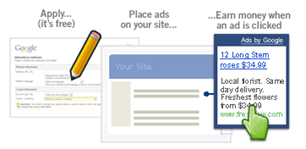
image

Earn money with Google Adsense !


You can easily earn money from your blogger blog by creating  or integrating it with Google Adsense account. Just place Google ads on your blog and if you get good traffic then you blog can earn you money depending upon the number of clicks and page impressions.


  • It’s Google :

Google is awesome !

It was bought by Google and you can expect a lot amazing apps, widgets and cool plugins for Blogger blogs in future as it’s a part of Google now!.


If you Love Struck loved my post, then feel free to subscribe to my feed Click here!

How to check which Adsense ads are displayed on your blog

Monday, June 27, 2011


Adsense Sandbox

AdSense Sandbox is an amazing tool by Digital Inspiration which helps you to know which type of Google Ads will be displayed on your blog using your keywords and geo targeting.


You just have to put your blog url or the keywords on which you want to see the related ads, you can also choose any Country if you want to filter the results by any particular location like you may choose India and then it will show only those ads targeted in India.


My blog's ad preivew in sandbox

Here’s a small preview of my blog’s ads


It’s a great tool to manipulate and preview the ads shown on your blog, because you can change the ads by just modifying the keywords. It shows you all type of ads like image, video and textual ads of all sizes, based on your query.


If you Love Struck loved  my post, then feel free to subscribe to my feed Click here!

What are Do-Follow links and No-Follow links

Friday, June 24, 2011

image


Making a blog popular is really a hard job and it needs a lot of effort. And if you have been trying to improve your blog’s traffic and visitors, then you must have heard the Do-Follow and No-Follow links on many websites and you might be wondering what the heck are these terms made for, even I was not aware of these strange words but believe me understanding them can help you get a lot of unique traffic to your blog.


There are 2 types of links Do-Follow Links and No-Follow Links :


Do-Follow Links: The links we generally use but are unaware of them are Do-Follow links.


For example this link Google is written as :


<a href="http://google.com">Google</a>


These links are pretty normal in use.


No-Follow Links: These links are also very similar to the normal links but have one small difference in writing their HTML code which is the rel=”nofollow” attribute.


For example this link Google is written as a No-Follow link as :


<a href="http://google.com" rel="nofollow">Google</a>


You can see that Do-Follow link and No-Follow link look same except for the rel attribute used in No-Follow link.


What are really Do-Follow and No-Follow links?


The more you have do-follow links to your blog from other blogs and blog directories, the more your website becomes popular and stands a good chance to get a higher Page Rank from Google. If a blog has page rank 6 and t has your blog’s link which is a do-follow link then your website is getting a piece of his Page Rank Cake too! and the value of your link in the Search Engines increases which helps in driving more traffic to your blog from Search Engines because these links are visible to Search Engines.


However no-follow links are just the opposite of Do-Follow links, these links don’t give any benefit to the website to which they link to. So you cannot expect any Page Rank increase or traffic increase from these links. They are only confined to single website and are not crawled by the Search Engine Spiders, which simply means that these links are not visible to Search Engines. So No-Follow links are of no use to your blog if you are doing a SEO of your blog.


So if you want to increase visitors and traffic to your blog then you should consider getting a backlink from Do-Follow websites.


If you Love Struck loved  my post, then feel free to subscribe to my feed Click here!

How to enable Mobile Blogger Templates for Blogger blogs

Thursday, June 16, 2011

Mobile Template version of my blog

Blogger has launched a new feature for blogger blogs with which you can give a different view of your blog to the mobile web users. Now you can enable the mobile template for your blog which shows your blog in a more simple way without any big images, animations and advertisements on mobile devices.


You don’t have to make any changes to your current blogger template, all you need to do is enable the setting on your blogger dashboard.


Here’s How to do it:


  • On Dashboard screen click on Settings


Blogger>Dashboard>Settings


  • Go to Email and Mobile Tab.


Settings>Email & Mobile


  • Under Mobile Template choose Yes and you are set.


Click on Yes and enable Mobile Template


  • You can also preview how your blog looks in the mobile template version by clicking the mobile preview or by scanning the QR code with your mobile camera.


What’s different in Mobile Template


The mobile template for blogs just only shows up the posts and the comments from your blog, so that the blog can be easily viewed in any mobile browsers like Iphone Safari, Android and others.


So whenever someone open your blog from Mobile device, they will see the mobile version not the original version. Remember, No other links, buttons, ads and any other stuff on your blog are shown up in mobile template except those mobile adsense ads which are shown on the top. The full original desktop version can also be viewed by clicking the Web Version link below.


The mobile templates loads up real fast on mobile browsers and it makes the blog to be read easily on small screens of mobile devices.


If you Love Struck loved  my post, then feel free to subscribe to my feed Click here!

How to add +1 button to blogger blog posts

Tuesday, June 14, 2011

New Google +1 Button

The new Google +1 button can be seen on many websites and blogs these days and is becoming quite popular on Blogger as well as Wordpress blogs. The button is like other Digg Buttons and Reddit buttons we see on many other blogs.


How it works


Learn what is the this +1 button all about


Every time you press the +1 button, 1 is added to the count which shows that it is being liked by other bloggers over the web. You will need a Google Account to be able to click on +1 button.


How to add +1 button to Blogger blogsTall Google +1 Button


  • Login to your Blogger Blog


  • On Dashboard screen click on Design

click on Design tab


  • Now click on Edit HTML on top tabs.
    Click on Edit HTML to see the HTML code


  • Click on Expand Widget Templates to show up the complete HTML template code.

Expand your Template to view the full code


  • Now find the </head> tag inside the HTML code of your blog and place the following code just before this tag:


    <script type="text/javascript" src="http://apis.google.com/js/plusone.js"> {lang: 'en-US'} </script>


  • Now again find <data:post.body/> and paste the code below to display the button on left or right of post body by changing the value of float:left or right.

    <div style='float:right'>

    <g:plusone size="tall" expr:href="data:post.url"/>
    </div>


  • Click on Save Template and now you can see a +1 button on your posts.


  • You can also choose other different +1 buttons like small,standard just click here


If you Love Struck loved  my post, then feel free to subscribe to my feed Click here!

Read less and Understand better!

Saturday, March 5, 2011

image

I have been researching on this thing a lot and whether people like to read articles on websites to understand something. And I have to conclusion that most of the people on Internet are lazy. By saying lazy I mean that guys on Internet want to understand and learn things by spending less time and easily. Hope you guys got me. Open-mouthed smile.


So why am I Telling you this?


Simply getting to the point, If you blog then try to write less to explain something to your readers that is use less words and say many things. If there is a lot of text on your Blog then its very difficult to get some precious new readers for your dying blog Disappointed smile.  Writing more confuses the readers a lot and they get frustrated and bored easily, then all they do is leave your website ASAP!!.


Here’s the simple solution! to this problem :


‘’Always write precisely what you want to say in your blog and avoid using some hard vocabulary .’’


In my opinion this helps to give a better start to your new blog and help maintain your readers if your blog is getting old.


If you Love Struck loved  my post, then feel free to subscribe to my feed Click here!

Why and How to use labels in Blogs

Saturday, January 16, 2010

How to on Using Labels in Blog


Labels are great way to sort and mange the posts on your blog. When I started this blog, I was also not aware of what is the use of labels and how to use them.But they are one of the essentials in your every blog post. If you are also not using them then trust me you are missing a big thing in making up your blog.


Why and How to Use Labels ?


As the number of posts grow it is very difficult to show them up on your main blog page because your blog becomes to bulky to be opened up by a browser, so here comes the labels. They allow you to put different posts under different categories with specific words you choose. So whenever a person searches for any keyword on your blog then the posts with the same labels or keywords are showed up in the search results. This lets the viewers surf your blog in a very easy manner. For example the person search for posts related to Apple on your blog then all the posts with label apple are shown in the results.


Using Labels in Blogger blogs:


  • Open up your blogger account on blogger.com
  •  newMake a new post.


labels

  • Now after you finish writing your post, put the labels in the field “Labels for this post:”
  • Then click onpublish publish post.


Setting Labels in Blogger blogs:

  • After you have logged into your blogger account


layout

  • Go to Page Layout.


Click on Edit.

  • Under Blog Posts click on Edit.


Check the Labels..

  • Make sure that labels is checked so that the labels are visible in your blog posts.


  • Save and exit.


You should also show up the labels in your blog through tag clouds, i have found an amazing flash animated tag could @ bloggerbuster.com you can use it easily and it looks beautiful too!.Always try using main keywords for labels like technology for gadget articles, news for latest news posts and so on. So if you are not using labels then start using them now.


If you Love Struck loved  my post, then feel free to subscribe to my feed Click here!

How to make a Twitter Background and increase followers !

Monday, January 4, 2010

How to make a Twitter Background

Twitter is spreading like fragrance all over the blogosphere these days, and if you are blogging than a twitter account is must for your blog. It help you shout for the updates you do on your blog. And these updates make impact only if your Twitter account has a large number of followers.


How to increase twitter followers ?


Although you can start following multiple people in a day on Twitter but that will not bring those interested followers to your account which are formed naturally. To bring those natural interested followers to your account, one way which I have seen on many successful bloggers accounts is their gorgeous looking Twitter Background.


How to make a custom Twitter Background ?


A twitter background should be like an overview of your website so that a follower can understand what you write about. The custom background can also act as a Business Card showing your personal information.


For a twitter profile i would suggest you to make a background of resolution 1024 x 768 px. In twitter your background overlaps with your profile, if the resolution is decreased.

Here’s how profile overlaps on different resolutions


When viewed in 1024 x 768Viewed in 1024 x 768

  When viewed in 1280x 800 Viewed in 1280 x 800


To tackle this you always have to make sure that your profile looks perfect in 1024 x 768 screen resolution. If the twitter profile looks good in this resolution then it is obvious that it will look perfect in bigger screen resolutions.


Layout Plan of Twitter . Twitter Layout Plan


Make new file with a resolution of 1024 x 768 px and then you should design the background within 150 to 155 pixels from the left edge. This is my approximate value from where you should design it will look perfect when applied on twitter and viewed 1024 x 768 to any resolution.


exampleExample

In this 150 pixels design space, start designing from top left corner. Here  you can show your blog logo, you web address and write a short description about you web site like i did on my background. Always show your URL on the background as it matters the most.


And finally save your image in GIF, JPEG or PNG format and apply to your background.


If you Love Struck loved  my post, then feel free to subscribe to my feed Click here!

How to add Related Posts widget in Blogger blogs

Saturday, January 2, 2010

blogger-logo If you are searching for a blog widget which help you display the related post on your post footer then you are on right place. I have found some real cool widgets for Blogger blogs which can be added to blogger blogs with ease. These widgets are of great use as the reader spends more time reading your blog and you get the maximum benefit. They are the best way to make reader explore your blog in easy way.


Some of the best assorted widgets are below, so check them out :


1. Linkwithin Widget :


linkexaple You can go to Linkwithin.com and get this widget by filling up your Email, Web address , your blogging platform and the number of posts you want to show up. No sign-up is required, just fill up the  details and you will see a new page opened with complete instructions on how to install on your blog.


linkwithin

1.1 In the first step click on install widget.


blogger window

1.2 A blogger window will open then click on add widget.


1.3 That’s it now the widget is added on your blog layout .


layone

1.4 Just move it to the post footer and click on save, now the widget should be visible on your post footer.


2. Blogger Widget :


asdf

This widget is from Bloggerplugins.org, it will also display the post the same way Linkwithin widget did. It’s based on displaying the posts accrording to the blogger labels that is the posts related to the same labels are displayed only. This widget is added by editing the html code of your blog. To start applying it open up Edit Html of your blogger blog by signing in to the blogger. Click on the Expand widgets template to open the complete template. Now you have to search for some code and then copy and paste the widget code into the template. You can follow the post here Bloggerplugins.org . Just like the linkwithin widget you can also set the maximum number of post to be displayed by changing the value in this line of code :


var maxresults=5;


So these were the two widgets with thumbnails, there are also other widgets which display only text links to the related posts but I think they do not have much impact on the reader as the ones with thumbnails is more attractive.


If you Love Struck loved  my post, then feel free to subscribe to my feed Click here!

Related Posts with Thumbnails


Copyright © Blog Rescue